
Last year, I put out a Blog on FSLogix's quick Default Exclusions explanation. Here FSLogix Default Exclusions Explanation and Quick Fix (mycugc.org)
That solution is working very well. But anything that remains in the FSLogix Profile before I reversed the GPO to purge the %Temp% and INetcache doesn't purge from the user's profile. I needed a quick solution to achieve this, and I recall reading about this somewhere, but I couldn't remember. Later that night, I went to bed with it heavy on my mind, and while I was sleeping, Around 3 am or so, I raised out of best remembering reading Aaron Parker FSLogix blogs a couple of years. At this time, I hopped on the computer and did a quick google search. "How to purge Fslogix Profiles." Sure enough, the name "Steal Puppy stuck out." Most often, it's a usual way of life for me. I am always thinking of what I don't know, how I can do whatever I am dealing with, and even how to get to the next level. Sadly, it consumes me mentally, yet I always find a solution from other talented people in Industry. Ok, let's get back on track. Here is the article I was referencing.
A Practical Guide to FSLogix Containers Capacity Planning and Maintenance (stealthpuppy.com)
Please understand that I copied the pruned material and put it here to understand what I am talking about in my references.
Prune the Profile
"Not all profile locations are candidates for adding to the redirections.xml and excluding from the Profile Container. Consider history and cookie folders that would negatively impact user experience if they were not maintained across sessions. In this case, we can run regular maintenance on additional folder locations inside the profile to keep the size in check. This approach won't directly reduce the size of the profile per se, but will assist in containing growth."
"I've written a PowerShell script - Remove-ProfileData.ps1, that can prune or delete a set of target files and folders. The script reads an XML file that defines a list of files and folders to remove from the profile."
"Actions on a target path can be:"
"Prune - the XML can include a number that defines the age in days for last write that the file must be older than to be deleted"
"Delete - the target directory will be deleted. The Delete action will delete the entire folder and sub-folders"
"Trim - where the target path contains sub-folders, this action will remove all sub-folders except for the most recent. This approach is implemented to clean up applications such as GoToMeeting that can store multiple versions in the profile"
"The script supports -WhatIf and -Verbose output and returns a list of files removed from the profile. Add -Verbose will output the total size of files removed from the user profile and processing time at the end of the script. All targets (files / folders) that are deleted, will be logged to a file. Deleting files from the profile can result in data loss, so testing is advised and the use of -Confirm:$false is required for the script perform a delete. To prune the profile, run the script as a logoff action."
"A word of caution - this script is unsupported. If you would like to help improve the script, pull requests are welcome."
In my testing, I needed to prune a section of the profile. I have an application that uses IE (Soon Chrome Edge), but I need to get all this trash out for now. It seems IE is cache-heavy for the Web-based application. But the IE cache isn't just for IE. Other trash goes into here, and if I prune it, the area is empty.
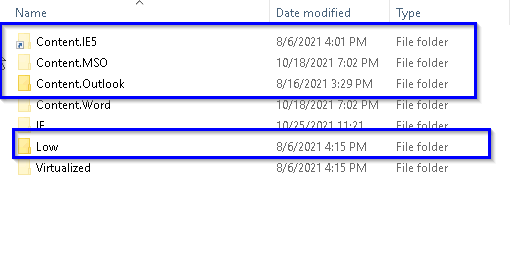
As you can see below, the INetcache folder is dumping it to the local_username. But it's not getting the old stuff because the GPO was updated and put in after I realized it wasn't working in my previous blog. Anything before the GPO was updated does not purge the data.
As you can see here in my example, the username_local is moving it to the scratch area. But notice the date on the folders. It moving new stuff only!
\\VDI\c$\Users\local_Test01\INetCache
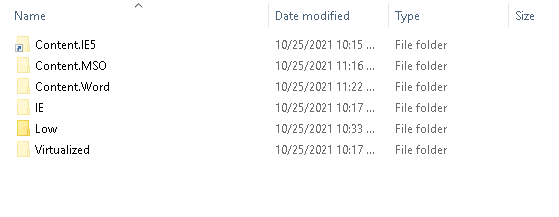
Perhaps this may still be a factor for the IE app because it shares the INetcache. But look at the actual location of what isn't redirected. You can see that the old stuff is still lingering around. This means that IE is looking at the INetCache for the overall "Cache storage." Some Web applications like the one I have in this environment, once the overall Cache Storage location is used up. Well, the application becomes extremely slow.
\\VDI\c$\Users\Test01\AppData\Local\Microsoft\Windows\INetCache
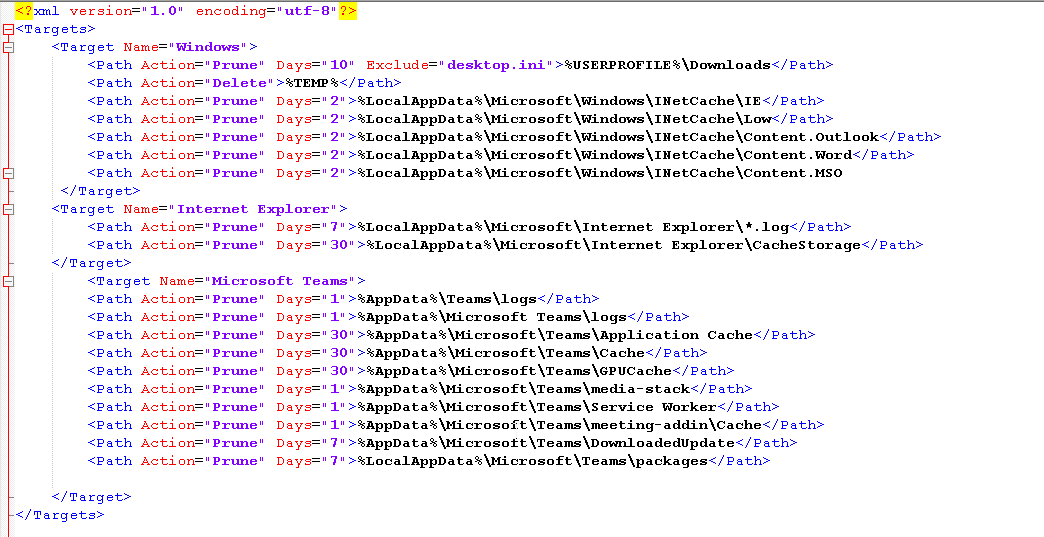
To ensure this location is purged, we can schedule the "Remote-Profile.ps1 script to run and take care of this. The script needs a Target file. The Target file is called with the parameters to understand what needs to remove from the FSLogix profile.
A reminder of how it works
"a PowerShell script - Remove-ProfileData.ps1, that can prune or delete a set of target files and folders. The script reads an XML file that defines a list of files and folders to remove from the profile."
Before
The screenshot shows the old data.
After
I remoted to a VDI machine, and then I executed the script.
C:\windows\system32\WindowsPowerShell\v1.0\powershell.exe -File "\\Domain\NETLOGON\CitrixScripts\WemExternalTask\ProfilePrune\Remove-ProfileData2.ps1" -Targets "\\Domain\NETLOGON\CitrixScripts\WemExternalTask\ProfilePrune\targets.xml" -LogPath \\Domain\NETLOGON\CitrixScripts\WemExternalTask\ProfilePrune\logs -verbose
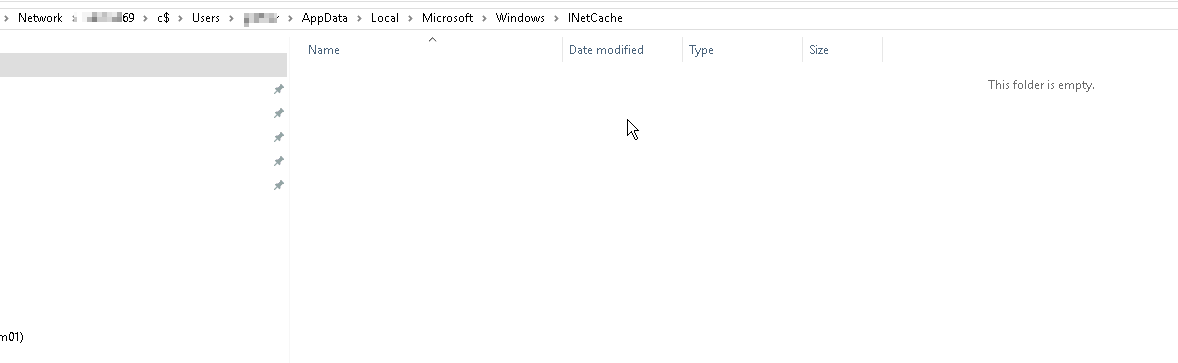
Location of InetCache throug UNC
\\VDI69\c$\Users\Test01\AppData\Local\Microsoft\Windows\INetCache
It looks like this has done the job for me, and there are many ways to implement this. I don't advise you to do it at logon, though, as it would impact the logon performance. You can do a Logoff script, scheduled task, or use a UEM tool
I am a big WEM fan myself. I don't use anything else at the moment. That alone is a whole other topic 😊
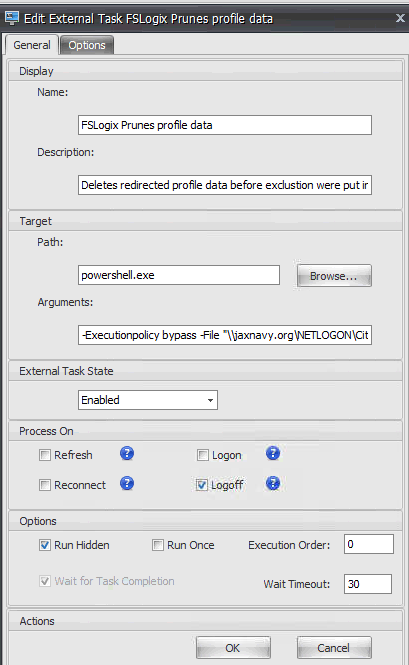
Open the WEM Admin Console>External Task

Click Add at the bottom, and fill in the data to the script location.
It is calling Powershell then the argument is to the location where the meat and potatoes reside
Argument
-Executionpolicy bypass -File "\\ sillyrabbit.org\\NETLOGON\CitrixScripts\WemExternalTask\ProfilePrune\Remove-ProfileData2.ps1" -Targets "\\sillyrabbit.org\NETLOGON\CitrixScripts\WemExternalTask\ProfilePrune\targets.xml" -LogPath \\ sillyrabbit.org\\NETLOGON\CitrixScripts\WemExternalTask\ProfilePrune\logs -verbose
Now, Click Assignments>add to the desired assignment.
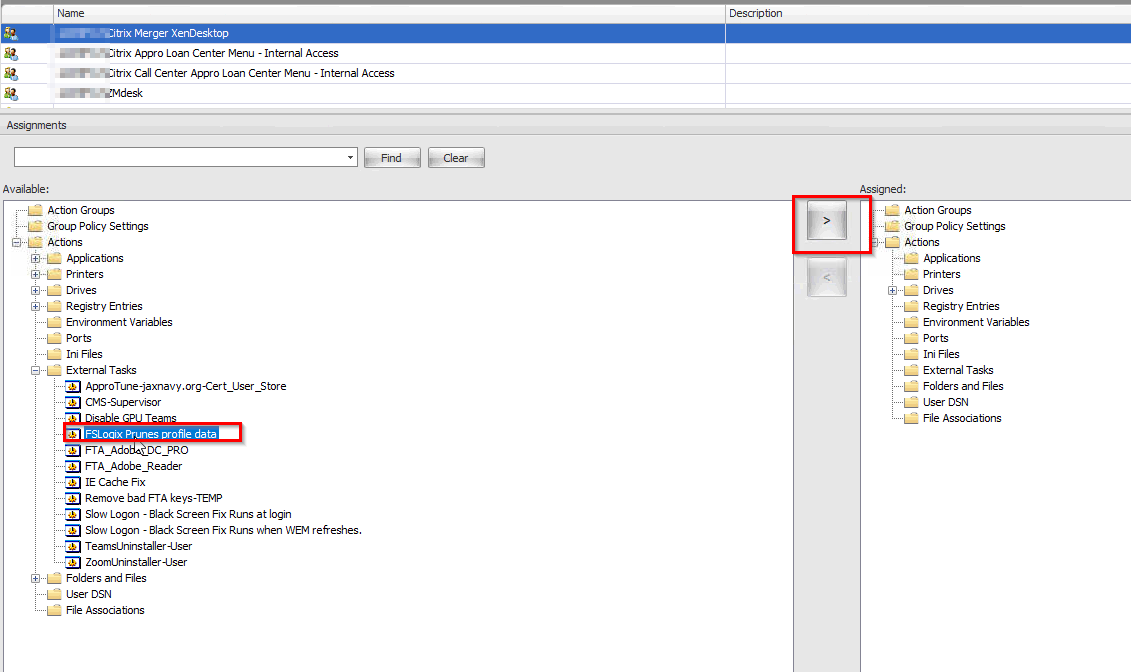
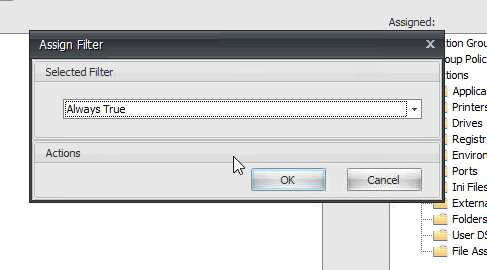
Select what Filter you have. I keep it elementary most times and do "Always True."
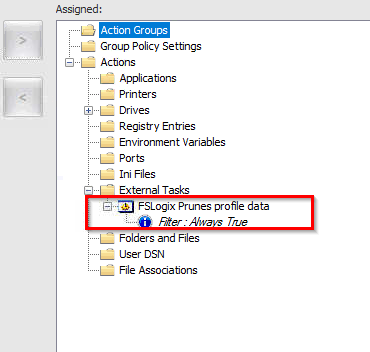
Now it's ready to go. Of course, you can refresh the WEM agent and force it.
No comments:
Post a Comment